The Windows Substem for Linux allows you to run a GNU/Linux environment on your Windows 10 system. May 2019 Microsoft made WSL2 available, a vast improvement on WSL1 because they now provide a full Linux kernel. WSL2 has been GA since the 2004 update of Windows 10 in May 2020.
This blog post is the result of my troubles in upgrading from WSL1 to WSL2. You can also use these instructions to install from scratch.
Windows version
As stated before, WSL2 is GA as of the 2004 update of Windows 10. That does not mean you need that particular version of Windows 10. To run WSL2, the minimum build version required is 18917.
Checking your build version of Windows 10 can be done in many ways, this method uses PowerShell.
- Open Start
- Type PowerShell and right-click the top search result
- Select Run as administrator
- In the PowerShell console type the following
[System.Environment]::OSVersion.Version
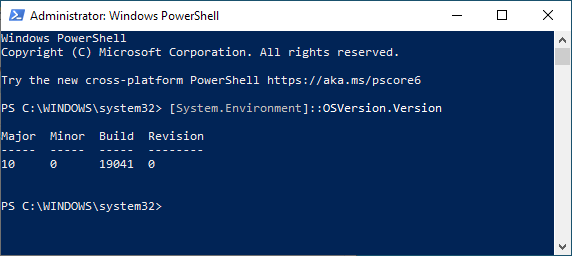
If your build is lower then 18917, you must first update Windows before you can continue.
Enable the Windows Subsystem for Linux 1
This step is only required if you are starting from scratch. If you already have WSL1 installed, go to the next section.
- Open Start
- Type Turn Windows features on or off and open the top search result
- Click the checkbox for Windows Subsystem for Linux
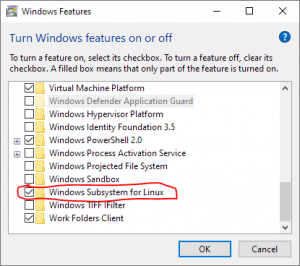
- Click the OK button and restart
Enable the Virtual Machine Platform
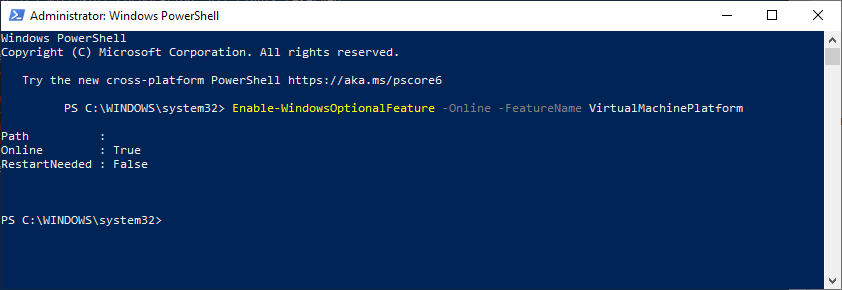
One key difference in architecture between WSL1 and WSL2 is that WSL2 runs it’s kernel in a lightweight virtual machine. So to use WSL2, the Virtual Machine Platform on Windows 10 needs to be started.
- Open Start
- Type PowerShell and right-click the top search result
- Select Run as administrator
- In the PowerShell console type the following
Enable-WindowsOptionalFeature -Online -FeatureName VirtualMachinePlatform
- The official docs advise restarting your computer. I, however, did not do this.
Install Windows Subsystem for Linux 2 Kernel update
To use WSL2 a kernel update is required.
- Download the kernel from here or use this direct link.
- Run the downloaded file.
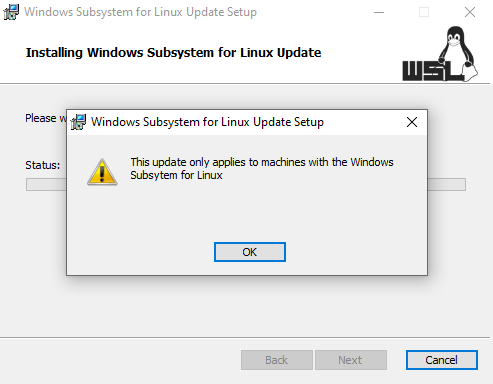
For me running the file did not work. Every time I launched the msi, I received the following error: This update only applies to machines with the Windows Subsystem for Linux.
To solve this.
- Open Start
- Type PowerShell and right-click the top search result
- Select Run as administrator
- In PowerShell cd into the directory where you downloaded the msi
- Type the following
msiexec -fav wsl_update_x64.msi
Enable the Windows Subsystem for Linux 2
With the prerequisites done, we are ready to set de default WSL to version2.
- Open Start
- Type PowerShell and right-click the top search result
- Select Run as administrator
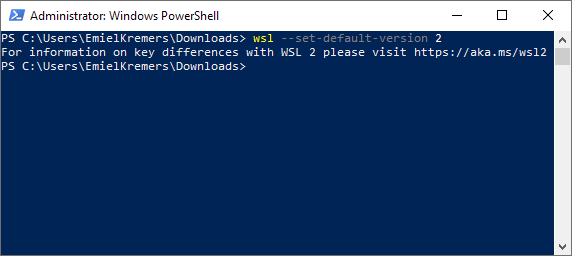
- In the PowerShell console type the following
wsl --set-default-version 2
Convert existing distributions
This step is only required if you created a distribution for WSL1 and you want to convert it to WSL2.
- Open Start
- Type PowerShell and right-click the top search result
- Select Run as administrator
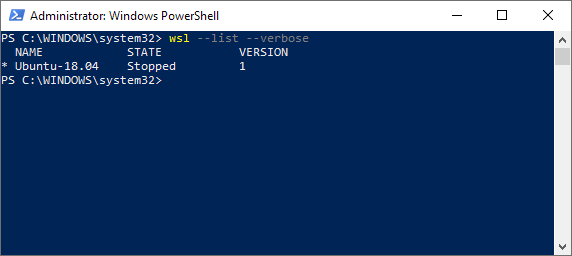
- The first thing to do is to list all the existing distro’s. In the PowerShell console type the following
wsl --list --verbose
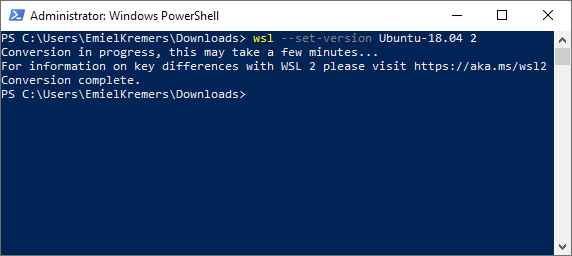
- Choose the distro you wish to convert into WSL2. In my case, there is only one, Ubuntu-18.04. Convert it into WSL2 using the following command
wsl --set-version Ubuntu-18.04 2
- Finally, verify that updating was successful by listing the wsl again.
That’s it, and you are done. You have now enabled WSL2, set it as the default version to use when creating new distros and converted your existing WSL1 distros.
Tip: enable virtualization
Don’t forget to enable virtualization in your BIOS before you start!
Tip: PowerShell console
Many of the subsections started with opening a PowerShell console. If you do these steps in quick succession, you can, of course, use a single console. There is no need to run each step in a separate console.

